Editing Images in the Media Library
TerminalFour allows you edit images (re-size and crop) by creating different versions or Variants of the original image file.
The first thing you need to do is select the image you would like to edit. When viewing the media library you can either click directly on the name of the image, or click the Action button to the right hand side of the screen for the specific image you would like to edit. In the Action drop down menu select "Edit".
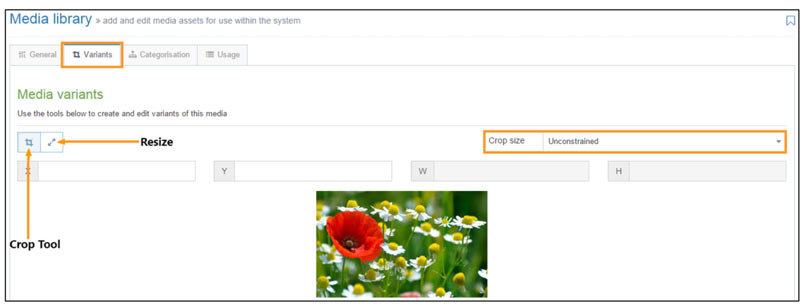
This will take you to a screen similar to the one pictured below. The tab at the top of the screen you are looking for is called 'Variants". Under this tab there will be two small icon buttons (shown below) for crop and re-size.
The features on this Variant page allow you to make modifications to the image and yet retain the original. Each variant has it's own name and can be found as a part of the original image file. Typically for images, resizing is a frequent alteration to standardize the sizes, or to ensure it fits where it is to be placed on your site.
NOTE: The T4 system automatically creates a number of variants for every image when they are added to the media library. These variants were programmed by the system administrators, so don't be surprised when you see a list of variants for a new image that you added to the media library.
Resize tool
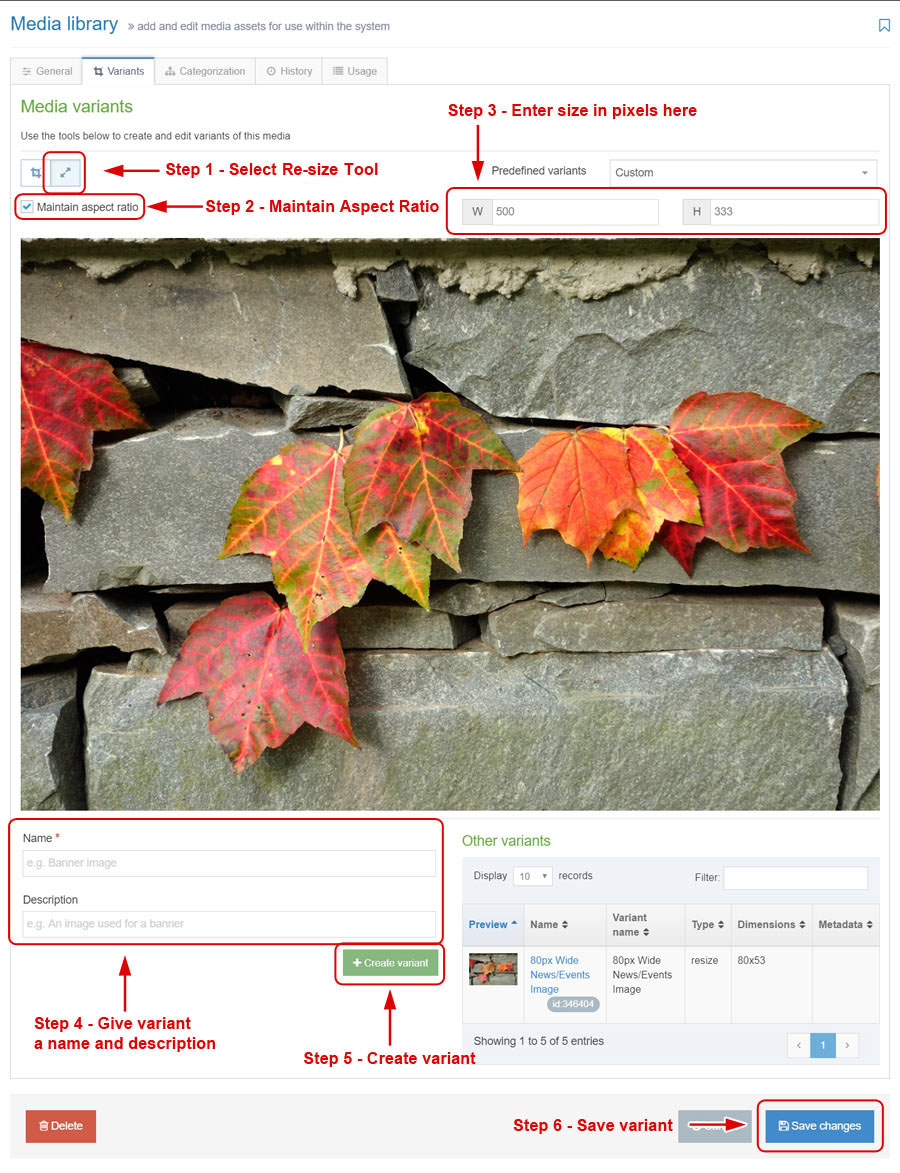
To Resize the image, you have three options. First, change the Variants window to the Resize options by selecting the Resize tool in the top left corner of the Main Workspace. This gives you your resize options.
- The first option is to select from the list of Predefined variants from the drop-down list (eg Home Page Slide Show Image). These Predefined variants are typically only useful for their stated purpose.
- The second and most common option is to leave Custom as the option in the Predefined variants box and manually resize the image.
NOTE: Check the Maintain aspect ratio box then enter a pixel value directly into the width (W) or height (H) this maintains the original aspect.
Enter a descriptor into the Variant name box (required) below and to the left of the image preview, and add a helpful Description (optional) for later reference. - The third option is to leave the Maintain aspect ratio box unchecked and directly enter W and H values as required.
NOTE: Using this method can result in a distorted image. Enter a descriptor into the Variant name box (required) below and to the left of the image preview, and add a helpful Description (optional) for later reference.
When you are satisfied with the resized image, click the green +Create variant button and the blue Save changes button.
The image below gives a step by step visual rundown of the steps required to re-size an image.
Crop Tool
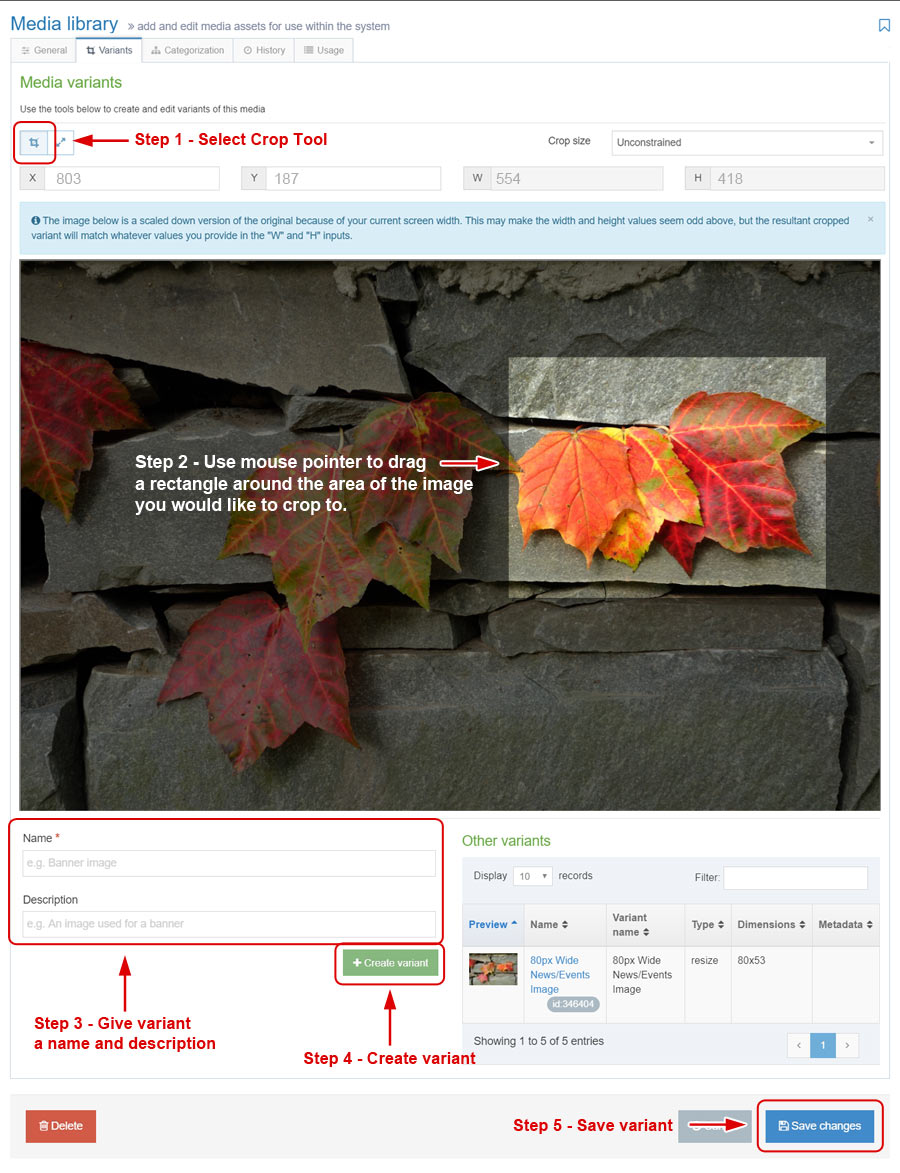
This tool is similar to most image editing tools. The tool is activated when you click the Crop icon. Using your pointer on the preview image, trace the boundaries of the cropped image you want to save. The portion of the image that remains dark is the portion that is removed from the image.
The image below gives a step by step visual rundown of the steps required to crop an image.
Once the new variant has been created, it will be stored as a part of the original, main image file. Selecting a variant comes after you select the original image to use on a web page.